As a Print UV supplier, I've encountered numerous challenges that customers face when using Print UV technology. In this blog, I'll delve into the common problems associated with Print UV and provide practical solutions to address them.
1. Uneven UV Curing
One of the most prevalent issues in Print UV is uneven UV curing. This problem can manifest in various ways, such as some areas of the printed material being fully cured while others remain sticky or only partially cured.
Causes:
- Inconsistent UV Lamp Intensity: Over time, UV lamps can lose their intensity unevenly. Some parts of the lamp may degrade faster than others, leading to inconsistent curing across the print area.
- Incorrect Lamp Distance: If the UV lamp is too far or too close to the printed material, it can result in uneven curing. A distance that is too far may not provide enough UV energy for proper curing, while a distance that is too close can cause over - curing in some areas.
- Printing Speed: Printing at an excessively high speed can prevent the UV light from fully penetrating and curing the ink. Different inks have different curing requirements, and if the printer is running too fast, some areas may not receive enough exposure.
Solutions:
- Regular Lamp Maintenance: Conduct regular checks on the UV lamps. Replace lamps that are nearing the end of their lifespan or show signs of uneven intensity. Most manufacturers recommend replacing UV lamps every 1000 - 2000 hours of use.
- Optimize Lamp Distance: Refer to the printer's user manual to set the correct distance between the UV lamp and the printed material. Make small adjustments and test the curing results until you achieve even curing across the entire print area.
- Adjust Printing Speed: Slow down the printing speed if you notice uneven curing. You can also consult the ink manufacturer to determine the optimal printing speed for their specific ink.
2. Ink Adhesion Problems
Poor ink adhesion is another common problem in Print UV. When the ink does not adhere properly to the substrate, it can peel off easily, leading to a poor - quality print.
Causes:
- Substrate Surface Contamination: Dust, grease, or other contaminants on the substrate surface can prevent the ink from bonding properly. This can happen if the substrate is not stored or handled correctly.
- Incompatible Substrate and Ink: Not all substrates are compatible with all UV inks. Some substrates may have a low surface energy, which makes it difficult for the ink to adhere.
- Insufficient Curing: If the ink is not fully cured, it may not adhere well to the substrate. This can be due to the issues mentioned in the uneven curing section.
Solutions:
- Clean the Substrate: Before printing, clean the substrate surface thoroughly using a suitable cleaning agent. This will remove any contaminants and improve the ink's adhesion.
- Choose Compatible Substrates and Inks: Consult with the ink and substrate manufacturers to ensure that they are compatible. Some substrates may require pre - treatment, such as corona treatment, to increase their surface energy and improve ink adhesion.
- Ensure Proper Curing: Make sure that the UV curing process is optimized. This includes checking the lamp intensity, distance, and printing speed as mentioned earlier.
3. Banding in Prints
Banding refers to the appearance of horizontal or vertical lines in the printed image. This can significantly reduce the quality of the print and make it less appealing.
Causes:
- Nozzle Clogging: Clogged nozzles can cause uneven ink flow, resulting in banding. This can happen if the printer is not used regularly or if the ink dries up in the nozzles.
- Ink Viscosity Issues: If the ink viscosity is too high or too low, it can affect the ink's flow and cause banding. Changes in temperature and humidity can also impact ink viscosity.
- Mechanical Problems: Issues with the printer's mechanical components, such as the carriage movement or the paper feed system, can cause inconsistent ink deposition and lead to banding.
Solutions:
- Clean the Nozzles: Use the printer's built - in nozzle cleaning function regularly. If the clogging is severe, you may need to soak the print head in a cleaning solution.
- Control Ink Viscosity: Store the ink in a temperature - and humidity - controlled environment. Some printers have an ink temperature control system that can help maintain the optimal ink viscosity.
- Check Mechanical Components: Inspect the printer's mechanical parts for any signs of wear or damage. Lubricate moving parts if necessary and ensure that the carriage moves smoothly.
4. Color Inconsistency
Color inconsistency is a major concern for customers who require accurate color reproduction. This can occur between different prints or even within the same print.
Causes:
- Ink Quality and Mixing: Variations in ink quality, such as differences in pigment concentration or batch - to - batch variations, can cause color differences. Incorrect ink mixing can also lead to inconsistent colors.
- Calibration Issues: If the printer is not calibrated correctly, it can result in inaccurate color output. This includes both hardware calibration (such as the print head alignment) and software calibration (such as color profiles).
- Environmental Factors: Changes in temperature, humidity, and lighting conditions can affect the way the ink dries and the color appears.
Solutions:
- Use High - Quality Inks: Purchase ink from reputable suppliers to ensure consistent quality. Avoid using expired or low - quality inks.
- Regular Calibration: Calibrate the printer regularly, both hardware and software. Follow the manufacturer's instructions for calibration to ensure accurate color reproduction.
- Control the Environment: Keep the printing environment at a stable temperature and humidity level. Use proper lighting when evaluating the prints to minimize the impact of lighting conditions on color perception.
5. Noise and Vibration
Excessive noise and vibration during the printing process can be a nuisance and may also indicate underlying problems with the printer.
Causes:

- Loose Components: Loose screws, belts, or other components can cause vibration and noise. This can happen due to normal wear and tear or improper installation.
- Motor Issues: Problems with the printer's motors, such as worn - out bearings or electrical issues, can cause excessive noise and vibration.
- Unstable Printing Surface: If the printer is placed on an unstable surface, it can vibrate more during operation.
Solutions:
- Tighten Loose Components: Regularly check the printer for loose parts and tighten them as needed. This can help reduce vibration and noise.
- Inspect and Replace Motors: If you suspect a motor problem, have a professional technician inspect and replace the motor if necessary.
- Use a Stable Surface: Place the printer on a level and stable surface to minimize vibration. You can also use anti - vibration pads to further reduce the impact of vibrations.
Our Product Recommendations
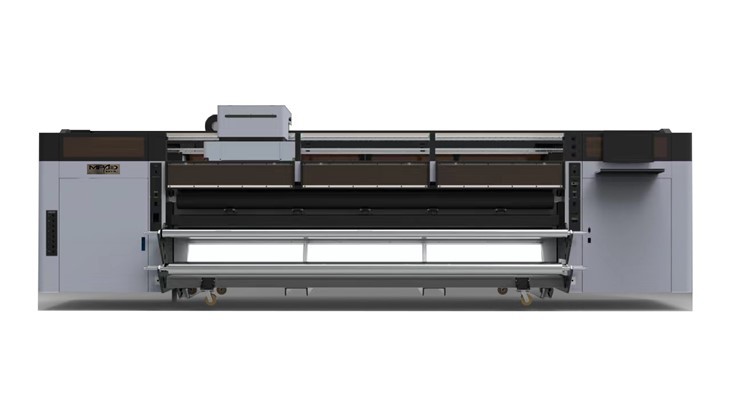
As a Print UV supplier, we offer a range of high - quality UV printers to meet your needs. Our UV Roll To Roll Printer High Speed is designed for fast and efficient printing, while our Large Format Banner Printers are perfect for creating large - scale prints. If you're looking for a versatile option, our Roll To Roll UV Printer is a great choice.
Contact Us for Purchase and Consultation
If you're experiencing any of the problems mentioned above or are interested in purchasing a Print UV printer, we're here to help. Our team of experts can provide you with personalized solutions and advice. Whether you're a small business or a large - scale printing company, we have the products and expertise to meet your requirements. Don't hesitate to contact us for more information and to start a purchase negotiation.
References
- "UV Printing Technology Handbook" by John Smith
- Manufacturer's manuals for various UV printers and inks