As a reputable Flag Printer supplier, I'm excited to share with you the process of printing a three - dimensional effect on a flag using our state - of - the - art flag printers. In this blog, I'll guide you through the entire procedure, from understanding the technology behind 3D printing on flags to the actual steps of achieving that stunning visual.
Understanding the Technology
Before delving into the printing process, it's essential to understand the technology that enables us to create a three - dimensional effect on flags. Our printers utilize advanced UV printing technology. UV printing involves the use of ultraviolet light to cure or dry the ink almost instantly as it is applied to the flag material. This technology offers several advantages for 3D printing on flags.
The UV inks used in our printers have excellent adhesion properties, which means they can bond well with different types of flag materials, including polyester, nylon, and cotton. Moreover, UV inks can be layered to create a sense of depth and texture, which is crucial for achieving a 3D effect. When combined with the high - precision printing capabilities of our printers, it becomes possible to produce flags with incredibly realistic and eye - catching 3D designs.
For more information about UV printing technology, you can visit our Print UV page.
Selecting the Right Flag Material
The choice of flag material plays a significant role in the final outcome of the 3D printing. Different materials have different characteristics that can affect how the ink adheres and how the 3D effect is perceived.
Polyester is a popular choice for flags due to its durability, resistance to fading, and relatively smooth surface. It allows the UV inks to spread evenly and adhere well, making it suitable for detailed 3D designs. Nylon, on the other hand, is lightweight and has good wind resistance. It can also provide a unique texture to the 3D printed design. Cotton flags offer a more traditional look and feel, but they may require some pre - treatment to ensure optimal ink adhesion.
When selecting the material, consider the intended use of the flag. If it will be displayed outdoors for an extended period, polyester or nylon may be the better options. For indoor displays or more decorative purposes, cotton could be a great choice.
Designing the 3D Flag
The design phase is where your creativity comes into play. To create a 3D effect on a flag, you need to think about how to use shading, perspective, and layering in your design. There are various design software tools available that can help you achieve this.

Start by creating a 2D base design. Then, use techniques such as adding highlights and shadows to give the design a sense of depth. You can also use overlapping elements to create the illusion of objects being in front of or behind each other. For example, if you're designing a flag with a landscape scene, you can make the mountains in the background appear smaller and less detailed compared to the foreground elements like trees or flowers.
Once you're satisfied with your 2D design, you can convert it into a format that is compatible with our flag printers. Most of our printers support common file formats such as SVG, EPS, and PDF.
Preparing the Printer
Before starting the printing process, it's crucial to prepare the printer properly. First, make sure the printer is clean and free of any debris or old ink. Check the ink cartridges to ensure they are filled with the appropriate UV inks. Our printers are designed to work with a range of UV inks, including CMYK (cyan, magenta, yellow, and black) and additional spot colors if needed.
Next, calibrate the printer. This step is essential to ensure accurate color reproduction and proper alignment of the printed design. Follow the manufacturer's instructions for calibration, which usually involves printing a test pattern and adjusting the printer settings based on the results.
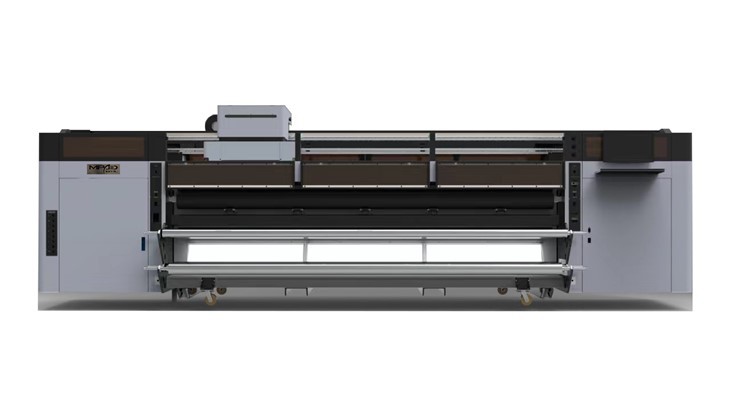
If you're using our UV Roll To Roll Printer High Speed, it offers advanced calibration features that can significantly streamline this process.
Printing the 3D Flag
Once the printer is prepared and the design is ready, it's time to start printing. Load the selected flag material onto the printer's feeding mechanism. Make sure the material is properly aligned and tensioned to prevent any wrinkling or misalignment during printing.
Set the appropriate printing parameters, such as the print resolution, speed, and number of passes. Higher print resolutions will result in more detailed and sharper 3D designs, but they may also take longer to print. You may need to experiment with different settings to find the optimal balance between quality and speed.
As the printer starts printing, the UV inks are applied to the flag material in layers. The UV light immediately cures the ink, ensuring that each layer is dry before the next one is added. This layering process is what creates the 3D effect. The printer can precisely control the amount of ink applied in different areas of the design, allowing for the creation of varying levels of depth and texture.
Post - Printing Finishing
After the printing is complete, there are a few post - printing finishing steps to enhance the final appearance and durability of the 3D flag.
First, let the flag rest for a short period to allow the UV inks to fully cure. This may take a few hours, depending on the type of ink and the environmental conditions.
Next, you can trim the edges of the flag to give it a clean and professional look. If desired, you can also add additional finishing touches such as hemming the edges or attaching grommets for easy hanging.
Quality Control
Before delivering the finished 3D flag to the customer, it's essential to conduct a thorough quality control check. Inspect the flag for any printing defects, such as uneven color, smudging, or missing details. Check the 3D effect to ensure that it is visually appealing and meets the customer's expectations.
If any issues are detected, take the necessary steps to correct them. This may involve re - printing certain areas of the flag or adjusting the printing parameters for future prints.
Cost Considerations
When it comes to printing 3D flags, cost is an important factor to consider. The cost of printing depends on several factors, including the size of the flag, the complexity of the design, the type of flag material, and the amount of ink used.
Larger flags and more complex designs will generally cost more to print. Additionally, using higher - quality flag materials and UV inks can also increase the cost. However, the investment in a high - quality 3D printed flag can be well worth it, as it can create a lasting impression and enhance the brand image or visual appeal of an event.
Conclusion
Printing a three - dimensional effect on a flag using our Flag Printers is an exciting and rewarding process. By understanding the technology, selecting the right materials, designing a compelling 3D design, and following the proper printing and finishing steps, you can create flags that stand out from the crowd.
If you're interested in purchasing our flag printers or have any questions about printing 3D flags, we invite you to reach out to us for a consultation. Our team of experts is ready to assist you in finding the best solutions for your specific needs.
References
- "UV Printing Technology: A Comprehensive Guide" - Industry Printing Magazine
- "Materials for Flag Printing" - Textile Printing Journal
- "Designing 3D Graphics for Printing" - Graphic Design Quarterly